How to Use the EUTHABAG Pet Body Bag
This guide outlines the essential steps for preparing, using, labelling, storing and transporting the EUTHABAG pet body bag in a veterinary facility, during an in-home euthanasia appointment or in any setting where a pet’s body must be cared for after death.
Before You Begin
Before placing the animal in the bag:
choose the appropriate size based on the animal’s size and weight;
lay the bag flat on the work surface;
fully open the top flap;
fold the panel underneath the bag.
When a blanket is used during the euthanasia procedure, it can be placed over the open bag. Remove the blanket before placing the animal’s body inside.
How to Place the Animal in the Bag
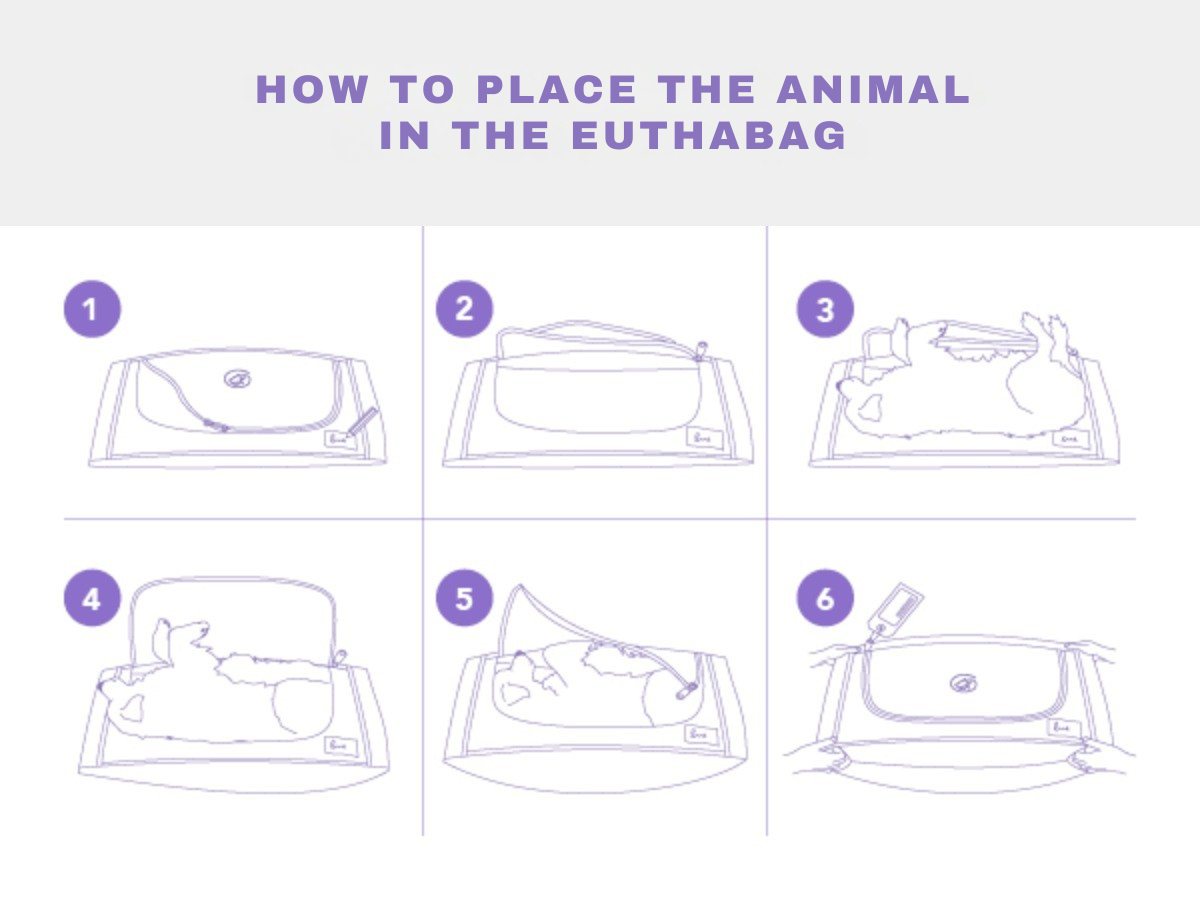
Label the bag using a pen or permanent marker.
Fold the top flap underneath the bag.
Align the curve of the animal’s back with the zipper.
Insert the animal’s hindquarters first.
Gently slide the front legs and head into the bag before closing it.
Transport the bag using the four integrated handles. A shipping label can be attached to the zipper.
Watch the videos to learn how to prepare, use and handle EUTHABAG safely.
How to Handle and Store the EUTHABAG Pet Body Bag
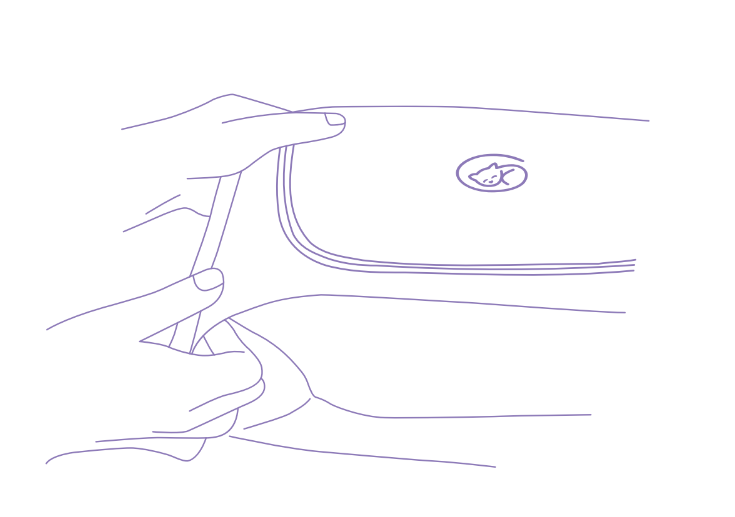
To move the EUTHABAG pet body bag, use the integrated handles at each end. Eight layers of fabric provide optimal strength, allowing the bag to replace a stretcher for animals weighing less than 30 kg.
Important: Do not lift or carry the bag by the top panel.
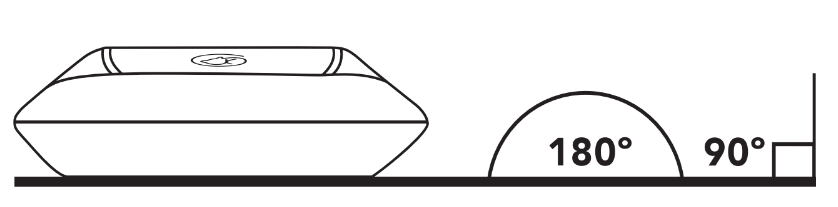
Store the bag flat to help prevent leakage—the zipper itself is not leak-proof—and to keep the animal’s body naturally positioned in case the family wishes to see their pet.
When the Family Takes Their Pet Home
When a family takes their pet home, we recommend accompanying them to their vehicle to help ensure that the bag remains flat during transport. This thoughtful gesture also communicates empathy during a difficult moment. For larger animals, we also recommend placing an absorbent pad inside the bag.
Download the PDF user guide to keep these instructions close at hand.